Least privilege
Record what your code calls, get a least-privilege policy, then enforce it on AWS.
By the end, you have the smallest set of permissions your code needs, and you've proved it works. All on your machine.
IAM (identity and access management) decides who may call what in a cloud. Least privilege means giving code the permissions it needs and no more. The hard part is knowing which ones those are. You do it in four moves:
- Record the calls a user makes.
- Read the policy pogi writes from them.
- Switch to strict mode, where every call without a policy fails.
- Attach the policy. Allowed calls pass and everything else still fails.
Before you start: pogi is running, your shell has eval "$(pogi env)" loaded, and the AWS CLI is installed. See First run.
1. Create a user and a key
The default test credentials are always allowed. Create a user with no permissions, and a key for it:
aws s3 mb s3://demo
aws iam create-user --user-name dev
aws iam create-access-key --user-name dev
The last command prints an AccessKeyId and a SecretAccessKey. Keep them for step 3.
2. Switch to soft mode
Soft mode allows every call and records what each user and role calls.
curl -X POST -d mode=soft http://localhost:7644/_pogi/iam/mode
pogi status | head -1
The first command prints nothing. The second shows the mode at the end of its line:
pogi 0.1.0 at http://localhost:7644 · up 57s · region us-east-1 · persistence false · iam soft3. Run your code as that user
In the same terminal, use the new key in place of the test credentials:
export AWS_ACCESS_KEY_ID=<AccessKeyId from step 1>
export AWS_SECRET_ACCESS_KEY=<SecretAccessKey from step 1>
aws s3 ls
aws sns create-topic --name alerts
aws sns list-topics2026-10-13 21:08:23 demo
{
"TopicArn": "arn:aws:sns:us-east-1:000000000000:alerts"
}
{
"Topics": [
{
"TopicArn": "arn:aws:sns:us-east-1:000000000000:alerts"
}
]
}Every call was allowed, and pogi wrote down each action and the resource it touched. Calls signed with the default test credentials are never recorded. Only calls from an IAM user's access key, or from an assumed role, are.
4. Read the policy
curl "http://localhost:7644/_pogi/iam/policy?principal=arn:aws:iam::000000000000:user/dev"{
"Version": "2012-10-17",
"Statement": [
{
"Effect": "Allow",
"Action": "s3:ListAllMyBuckets",
"Resource": "*"
},
{
"Effect": "Allow",
"Action": "sns:ListTopics",
"Resource": "*"
},
{
"Effect": "Allow",
"Action": "sns:CreateTopic",
"Resource": "arn:aws:sns:us-east-1:000000000000:alerts"
}
]
}There is one statement for each action. Resources are narrowed to the ARNs (resource names) your code used. Add &fmt=tf to the address to get Terraform instead.
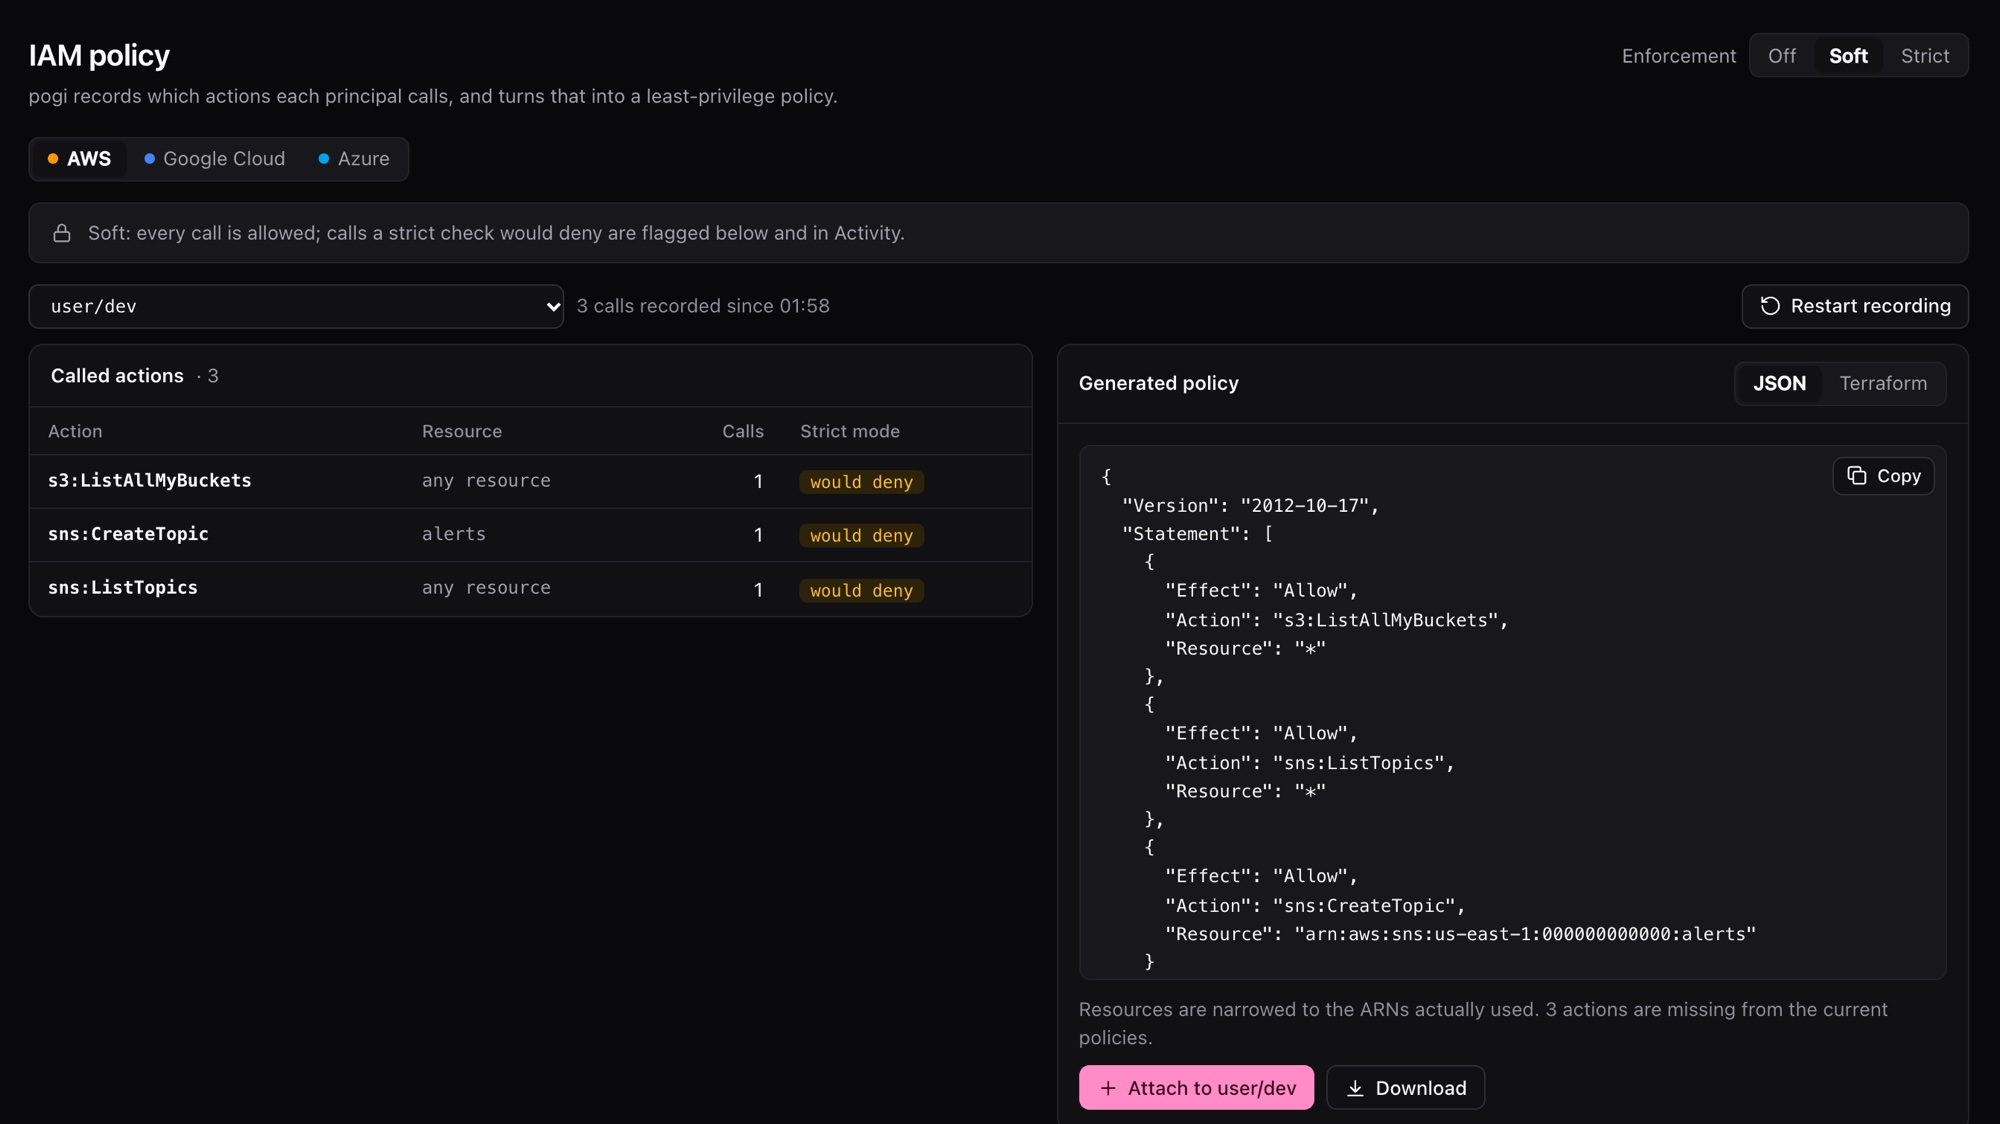
The console shows the same. Open IAM policy. For each user and role you see the actions called, whether strict mode would deny them, and the policy in JSON or Terraform.
5. Switch to strict mode
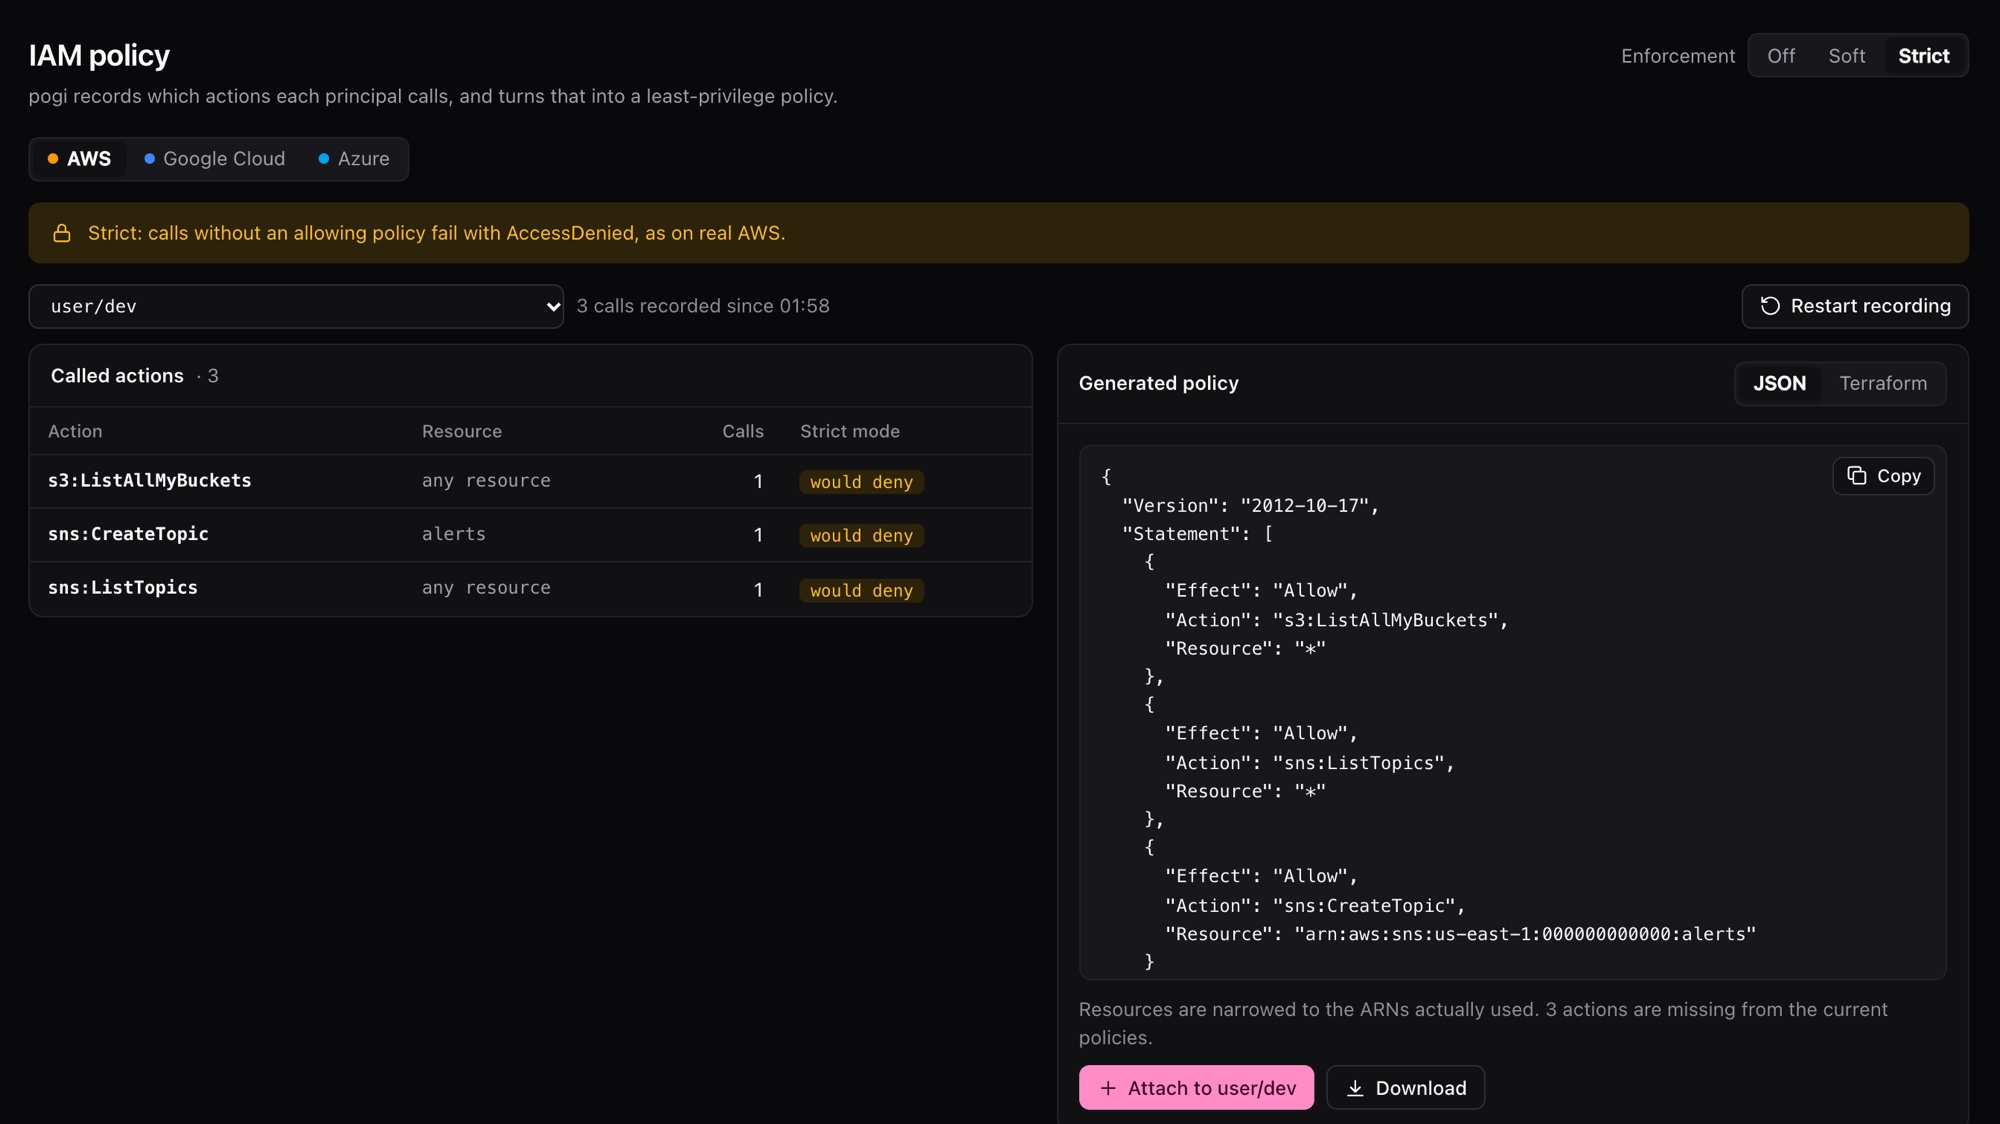
Strict mode denies every call that no policy allows. The dev user has no policy yet.
curl -X POST -d mode=strict http://localhost:7644/_pogi/iam/modeThis prints nothing. Then the IAM page flags every recorded action:
Don't run the user's calls yet. Strict mode records denied calls too, so attaching later would allow them.
6. Attach the policy
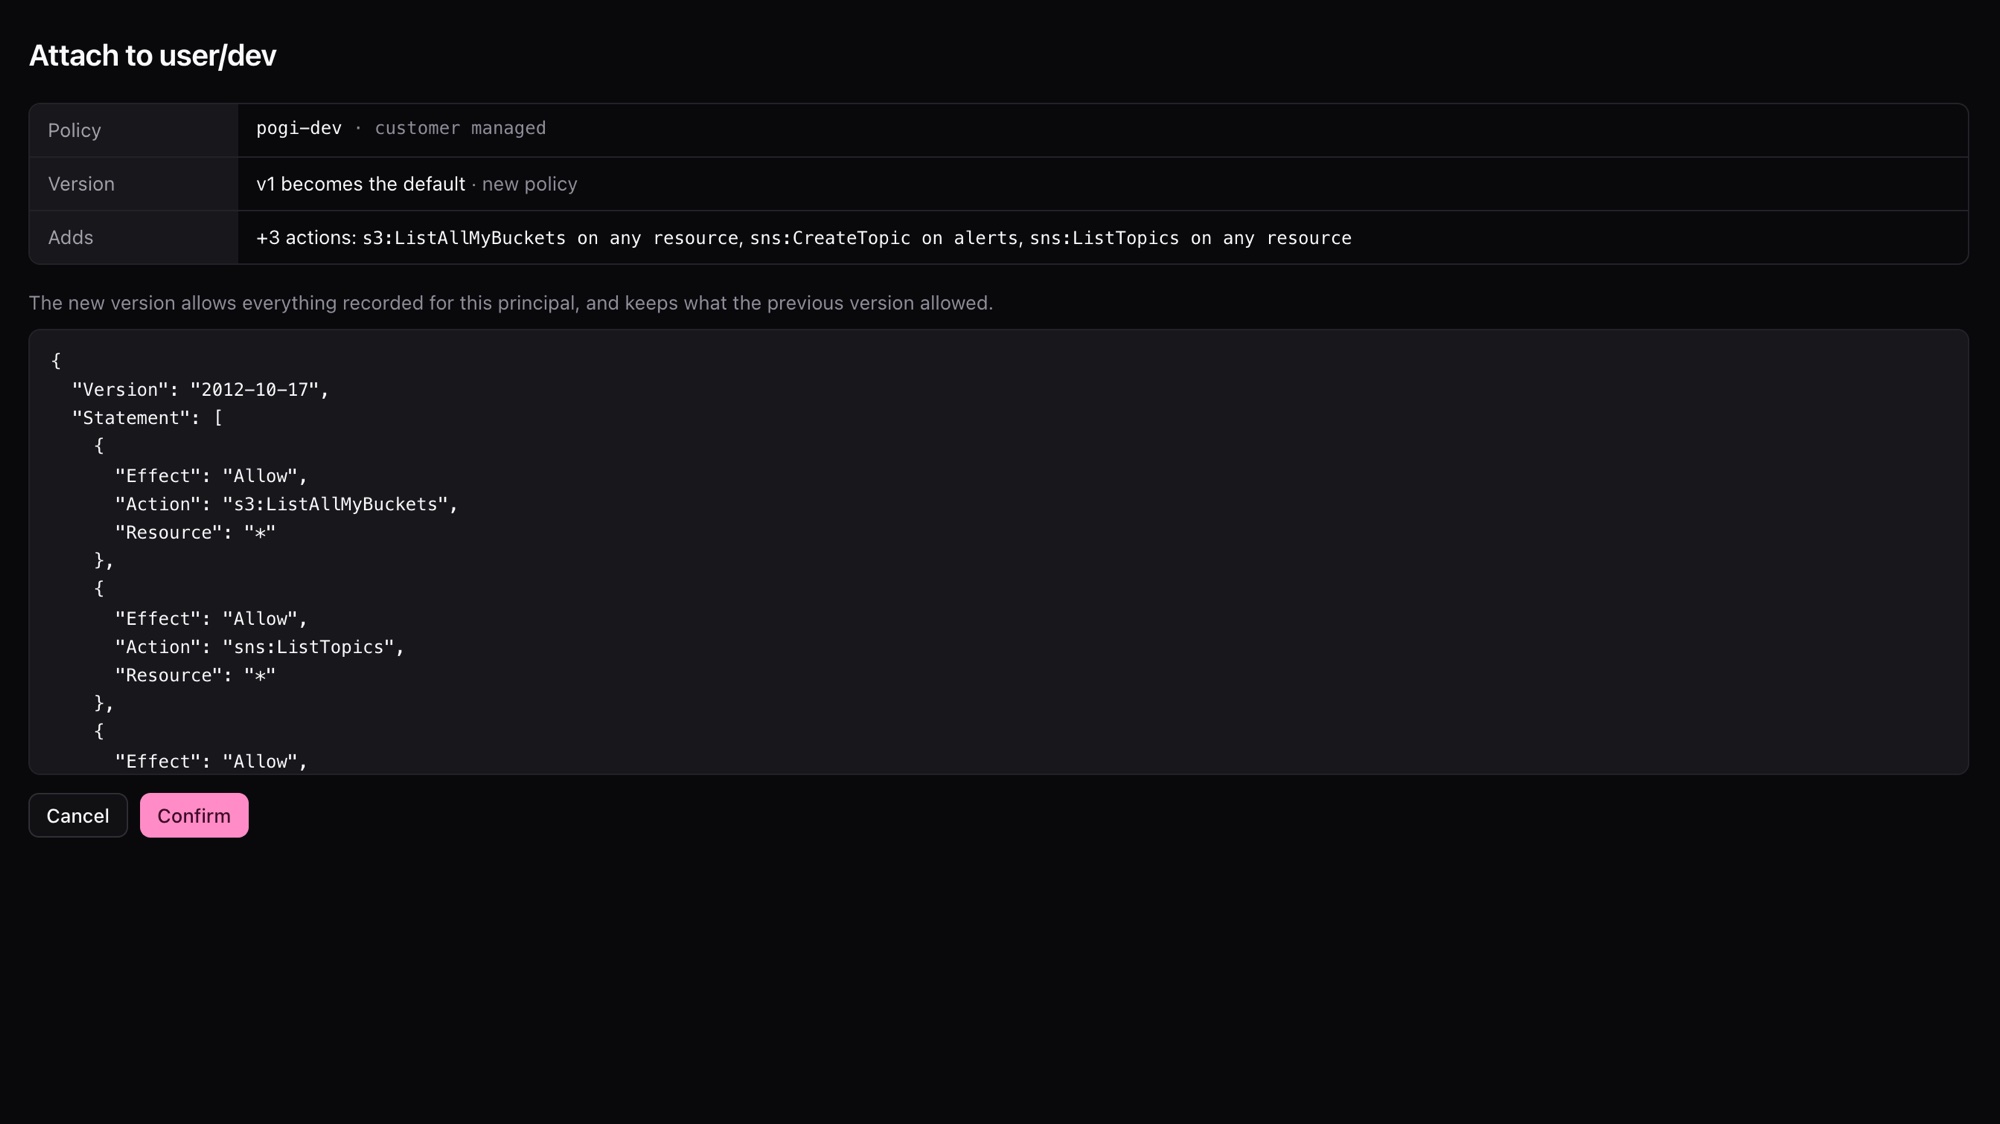
Attaching saves the policy in pogi and links it to the user. In the console, choose Attach on the IAM page. pogi shows what the new version adds, and you confirm.
From the command line, post the form the button sends:
curl -X POST --data-urlencode "principal=arn:aws:iam::000000000000:user/dev" \
  http://localhost:7644/_pogi/iam/attach
This prints nothing either. To check, open a new terminal and run eval "$(pogi env)". That gives you the default credentials, which are never checked. Then:
aws iam list-attached-user-policies --user-name dev{
"AttachedPolicies": [
{
"PolicyName": "pogi-dev",
"PolicyArn": "arn:aws:iam::000000000000:policy/pogi-dev"
}
]
}The policy is named pogi-dev. pogi keeps its older versions, and you can undo an attach in the console.
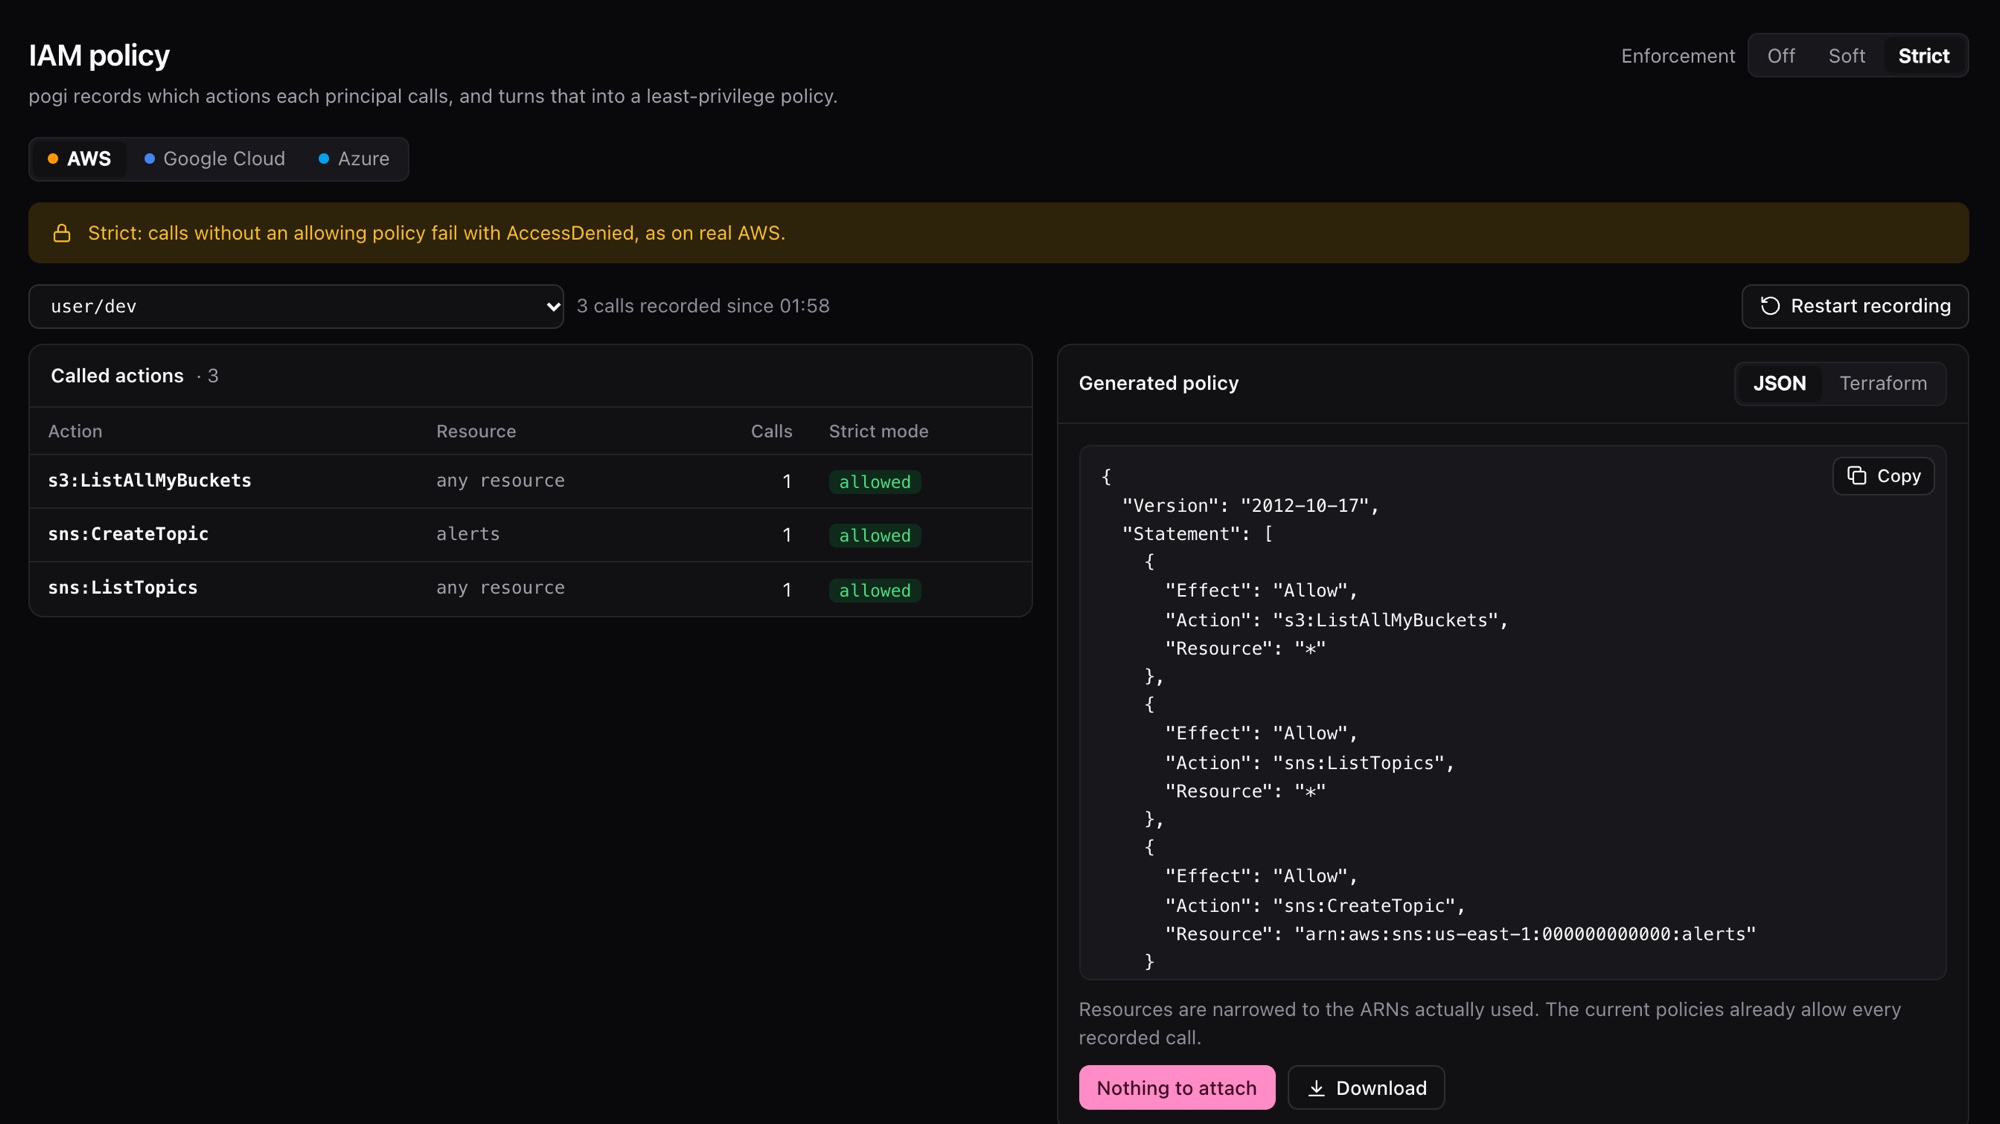
Back on the IAM page, all three actions now show "allowed".
7. Run your code again
Run as the dev user again, with the key from step 1. In the terminal where you set the key, run:
aws s3 ls
aws sns list-topics --query 'Topics[0].TopicArn' --output text
aws sqs list-queues
aws sns publish --topic-arn arn:aws:sns:us-east-1:000000000000:alerts --message hi2026-10-14 01:58:01 demo
arn:aws:sns:us-east-1:000000000000:alerts
aws: [ERROR]: An error occurred (AccessDeniedException) when calling the ListQueues operation: User: arn:aws:iam::000000000000:user/dev is not authorized to perform: sqs:ListQueues on resource: * because no identity-based policy allows the sqs:ListQueues action
aws: [ERROR]: An error occurred (AccessDenied) when calling the Publish operation: User: arn:aws:iam::000000000000:user/dev is not authorized to perform: sns:Publish on resource: arn:aws:sns:us-east-1:000000000000:alerts because no identity-based policy allows the sns:Publish actionThe two calls you recorded pass. The two you did not record fail with AccessDenied, with the same message AWS gives. In the console, Activity has an IAM denied filter. The IAM page now lists the two denied calls too, flagged "would deny".
Your code can now make the calls it made, and no others. If it needs another action, run it in soft mode, then attach again. pogi keeps the older versions of the policy.
The same on Google Cloud and Azure
The IAM page has tabs for AWS, Google Cloud and Azure. The steps are the same. Only the names change.
Google Cloud
pogi records calls made with an access token of a service account you created in IAM.
-
Create a service account.
gcloudprints its email address. Use it wherever you see<service-account-email>.gcloud iam service-accounts create worker1Created service account [worker1]. -
Get a token for it:
curl -X POST "http://localhost:7644/v1/projects/pogi/serviceAccounts/<service-account-email>:generateAccessToken" \ -H "content-type: application/json" \ -d '{"scope":["https://www.googleapis.com/auth/cloud-platform"]}'{"accessToken":"ya29.pogi-eyJlIjoid29ya2VyMUBw…","expireTime":"2026-10-13T16:39:04.390322Z"} -
Make a call with the token:
curl -H "Authorization: Bearer <accessToken>" "http://localhost:7644/storage/v1/b?project=pogi"{"items":[],"kind":"storage#buckets"} -
Read the roles the service account needs, as a
gcloudcommand:curl "http://localhost:7644/_pogi/iam/gcp/snippet?principal=serviceAccount:<service-account-email>"gcloud projects add-iam-policy-binding pogi --member=serviceAccount:<service-account-email> --role=roles/storage.admin -
Attach the roles. Choose Attach on the Google Cloud tab, or post to
/_pogi/withiam/ gcp/ attach principal=serviceAccount:<service-account-email>. Thengcloud projects get-iam-policy pogilists the binding.
Azure
pogi records calls made with the token of a service principal or managed identity that you created. It turns them into a least-privilege custom role. The Azure tab shows the role as JSON or as Azure CLI commands, and has the same Attach button.
Calls made with pogi's default credentials are never recorded or denied on any cloud.